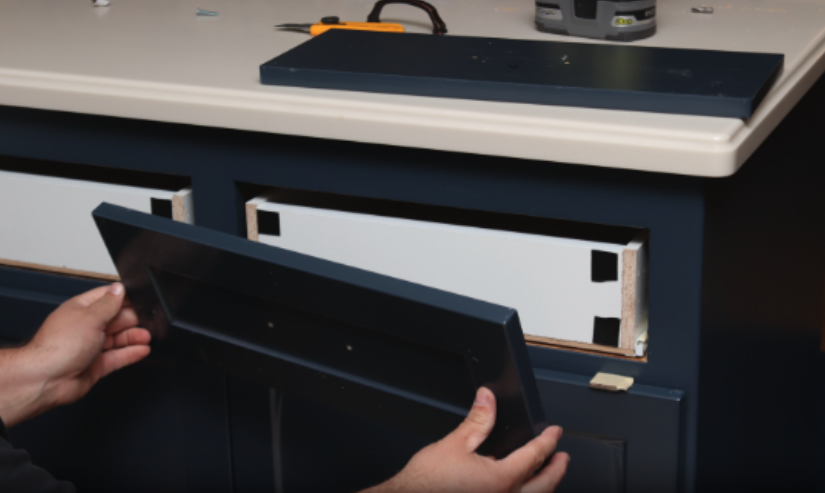
If you want to transform your chipped or outdated kitchen cabinets, but can’t think past some of the details like how to update the drawer fronts, read on. Here are step by step instructions to master your drawer front installation for your new custom manufactured drawer fronts. With these steps you will be well on your way to the kitchen cabinet refacing project of your dreams.
PRE-DRILL FOR HARDWARE
- It is best to pre-drill for decorative hardware before you install new drawer fronts.
- Place the decorative hardware to find a position you like – for pull handles, most people center on width and height.
- On the back side of the drawer front, mark the center by measuring horizontally and vertically. We find it helpful to draw an arrow pointing towards the top of the drawer front. This is especially helpful if you decide to install your handles off center, towards the top of your drawer front.
- Use a simple template to mark your holes on the backside of the drawer front. You can either buy a hardware installation template made for this purpose or you can use a piece of cardboard by using a sharp object to punch holes in the cardboard at the same spacing as your new handles.
- Place your template on the back side of the drawer front, and use a pencil to mark your drill holes. Hold your decorative hardware in place to double check that your drill hole marks are aligned properly.
- Drill holes using a drill bit slightly larger than your decorative hardware screws. Wait to install the hardware until after you’ve affixed the drawer front to the drawer box.
ALIGN THE DRAWER FRONT(S)
- Place a 1″ square of mounting tape in each corner of your drawer box. This will be used to temporarily affix the new drawer front.
- Carefully align the drawer front, using spacers to ensure even alignment between surrounding fronts.
- Hold the drawer front tightly against the face frame and pull the drawer box forward to make sure it comes in contact with the drawer front (you may need to open the door or drawer below and reach in from behind the drawer to pull it forward).
- Test your alignment. If you are not satisfied, use a rubber mallet to pop off the front and realign.
- Secure the front to the box by installing your decorative hardware using your pre-drilled holes.
- Place bumpers on the middle of each drawer front.
The biggest challenge for many people when doing a cabinet refacing project is just getting educated on how easy it can be to install. The time and money that cabinet refacing can save you on your kitchen renovation project. Check out our short video below to see it done step by step! or visit our YouTube channel for this and many other cabinet refacing tips from Front + Center.
Visit more pages on our website for other information on Front + Center cabinet refacing products.


